

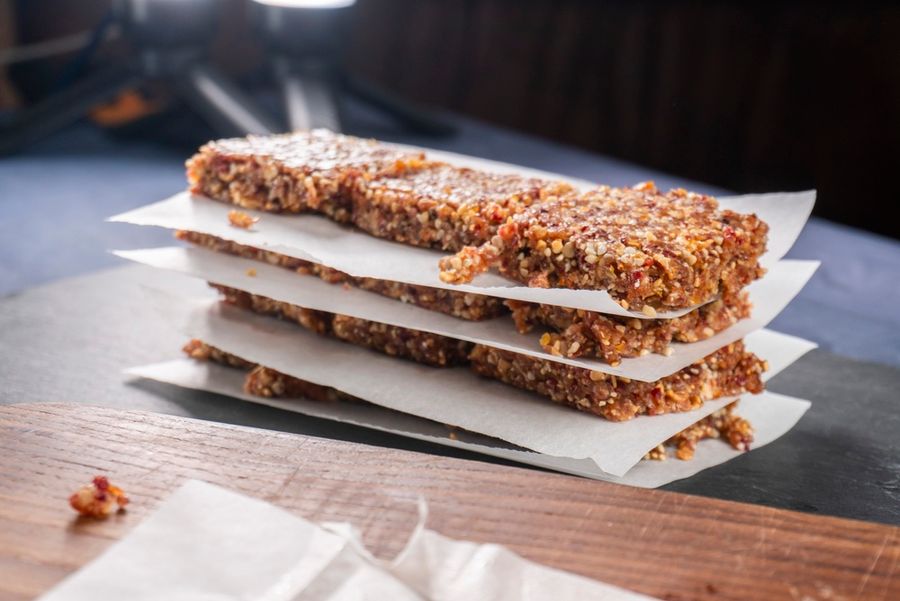
Homemade granola bars are one of the easiest snacks to build from ingredients already sitting in many kitchen cabinets. Oats, honey, nut butter, dried fruit, cereal, coconut, seeds, and chocolate chips can turn into chewy bars with very little prep. The best part is flexibility. A simple base recipe can become a lunchbox snack, breakfast bar, road-trip bite, or after-school treat without needing a long shopping list.
Start With a Simple Granola Bar Base
Most homemade granola bars begin with oats. Rolled oats give the bars a hearty texture, while quick oats can make the mixture softer and easier to bind. Some recipes also use crisp rice cereal, shredded coconut, ground flaxseed, or flour to change the texture and help the bars hold together.
A basic pantry formula is easy to remember: oats plus a sticky binder, a little fat, a flavoring, and about one cup of mix-ins. For a baked version, rolled oats, honey, butter, vanilla, flour, and optional add-ins can make a chewy bar. For a no-bake version, oats, nut butter, honey, and mix-ins can be pressed into a pan and chilled until firm.
Choose the Right Binder
The binder is what keeps granola bars from turning into loose granola. Honey is one of the most useful pantry binders because it is sticky and helps the oats and mix-ins hold their shape. Some recipes use honey with butter and brown sugar, while others use honey with almond butter or peanut butter.
Nut butter adds richness and helps no-bake bars set with a soft, chewy texture. Peanut butter, almond butter, or sunflower seed butter can all work, depending on what is in the pantry and whether the bars need to be nut-free. If the mixture looks dry or crumbly before pressing, adding a little more honey or nut butter can help the bars bind better.
Decide Between Baked and No-Bake Bars
Baked granola bars are a good choice when a firmer, toasted flavor is the goal. One baked method uses a 325-degree oven, a parchment-lined pan, and about 18 to 20 minutes of baking until the edges begin to brown. Another baked approach toasts oats and coconut first, then combines them with warm honey, peanut butter, vanilla, and salt before the mixture is pressed and baked again.
No-bake bars are better when speed and low effort matter most. These usually rely on a warm syrup or nut butter mixture that coats the oats before everything is pressed into a pan. After that, the refrigerator or freezer does the work. Some no-bake bars chill for one to two hours in the refrigerator, while others firm up in the freezer in about 45 minutes to an hour.
Use Pantry Mix-Ins Without Overloading the Bars
Mix-ins are where homemade granola bars become more interesting. Dried cranberries, raisins, chopped peanuts, almonds, sunflower seeds, pumpkin seeds, chia seeds, coconut, mini chocolate chips, and dried currants can all work well. The key is using enough to add flavor without adding so much that the bars fall apart.
A good starting point is about one cup total mix-ins for a standard pan of bars. That could mean half dried fruit and half chopped nuts, or a smaller amount of chocolate chips with seeds or coconut. Keeping mix-ins small also helps. Mini chocolate chips, chopped nuts, and small dried fruit pieces spread through the bars more evenly than large chunks.
Press the Mixture Firmly
Pressing is one of the most important steps. Granola bars need pressure so the oats, binder, and mix-ins settle into one firm layer. Parchment paper helps because it keeps the mixture from sticking to hands or tools. A second piece of parchment placed on top can make it easier to press the mixture evenly into the pan.
A greased measuring cup or the bottom of a glass can also help pack the mixture down. The goal is not a loose layer of oats. It should feel compact before it goes into the oven, refrigerator, or freezer. If the bars crumble after cutting, the likely causes are too little binder, too many dry add-ins, not enough pressing, or not enough chill time.
Cut Bars Only After They Set
Homemade granola bars need time to firm up before slicing. Baked bars often need a short cooling period before they are scored, then more time to cool fully in the pan. This makes cleaner cuts and helps the bars keep their shape.
No-bake bars usually need to chill first. Some recipes call for one to two hours in the refrigerator before cutting, while others call for freezing until firm. Once chilled, lift the parchment from the pan and slice the slab into rectangles or squares. Smaller squares can work well for kids, while longer bars are better for lunchboxes, hikes, and busy mornings.
Try Easy Flavor Combinations
For a classic pantry bar, use oats, honey, peanut butter, vanilla, and mini chocolate chips. This gives the bars a familiar sweet-and-salty flavor without needing many ingredients. For a fruit-and-nut version, use dried cranberries with chopped almonds, raisins with peanuts, or dried currants with sunflower seeds.
For a softer no-bake bar, combine oats with almond butter, honey, coconut oil, cinnamon, dried cranberries, and mini chocolate chips. For a lighter crunch, add crisp rice cereal to the oat mixture. For a coconut flavor, use shredded coconut with honey and peanut butter. These combinations keep the recipe flexible while staying close to common pantry ingredients.
Store Homemade Granola Bars the Right Way
Storage depends on the recipe. Some baked granola bars can be kept in an airtight container at room temperature for several days, refrigerated for longer storage, or frozen for later. One baked recipe lists room-temperature storage for four to five days, refrigerator storage for five to eight days, and freezer storage for up to six months.
No-bake bars often stay firmer in the refrigerator because they rely on chilled binders. Some recipes allow room-temperature storage for softer bars, but the refrigerator is better when a firm texture matters. Bars can also be wrapped individually in parchment or plastic wrap, then packed in a freezer-safe bag for grab-and-go snacks.
Build a Simple No-Bake Batch
For a simple no-bake version, line an 8-by-8-inch pan with parchment paper. In a large bowl, combine oats with no more than 1 cup total mix-ins, such as mini chocolate chips, dried fruit, chopped nuts, or seeds. In a separate bowl, stir together nut butter, honey, vanilla, and a small pinch of salt until smooth.
Pour the nut butter mixture over the oats and stir until everything is evenly coated. Press the mixture firmly into the lined pan, then freeze it until firm before slicing it into bars. If the bars seem crumbly, add a little more honey or nut butter the next time so the mixture holds together better.
A Snack Worth Making Again
Homemade granola bars are useful because they are simple, flexible, and easy to repeat. Once the base method is familiar, the recipe can change with whatever is in the pantry. Oats, honey, nut butter, dried fruit, seeds, coconut, cereal, and chocolate chips can all play a role.
The best results come from balance. Use enough binder, limit the mix-ins, press the mixture firmly, and let the bars set before cutting. With those steps, homemade granola bars can become a dependable snack for busy mornings, packed lunches, school days, errands, and weekend plans.